Showing posts with label first birthday. Show all posts

Sunday, 4 August 2013

Let's put a smile on that face!


These lollipop lips were just too cute not to make for Rory's party and I added in the moustaches for extra laughs. The problem was, how to display them. So I scavenged around in my kitchen and found a tube from a roll of non-stick baking sheets and the side of a cereal box and turned that into a rainbow lollipop holder.


I used my Silhouette Portrait to cut the moustaches and lips but you could cut it by hand. I have included the patterns so you can print them and if you would like the Silhouette or SCAL files I will gladly email them ( I designed the lips and 'stache so you are more than welcome to use them). The sign on top is also designed and cut in Silhouette Studio. And yes, I used the American spelling of moustache as it just worked better with the saying.


Side note: Anything I make and display on my blog is free gain. If you are able to make any of the items on my blog and are able to make money out of it I salute you. We need to share more in this world and if you can earn money from it then so can I. However I'd love to see any of your creations!


For this project I used:


Red, white and black cardboard

Glue

Water colour pencils

Paint brush

A cardboard tube (about 30 cm)

Strips of a cereal box (about 20 cm long and 1.5 thick x4)

Suckers (I used Fizzpops)

A drill

Scissors

Silhouette Portrait


First I cut the lips and moustaches and carefully pushed the sticks through the X in the middle. If you printed them then just use a craft knife to cut a small X (just bigger than the sucker stick) in the centre of the lips or moustache.


The signs are made using lettering cut-outs stuck onto cardboard (21cm x 15cm) but stickers would work just as well. For the moustache sign I coloured white board with the watercolour pencils and used one of the cut-outs as a decoration. For the lips I took the negative of the cut-out and used it as a stencil and coloured rainbow lips onto black cardboard and wrote “kissy” words around them.


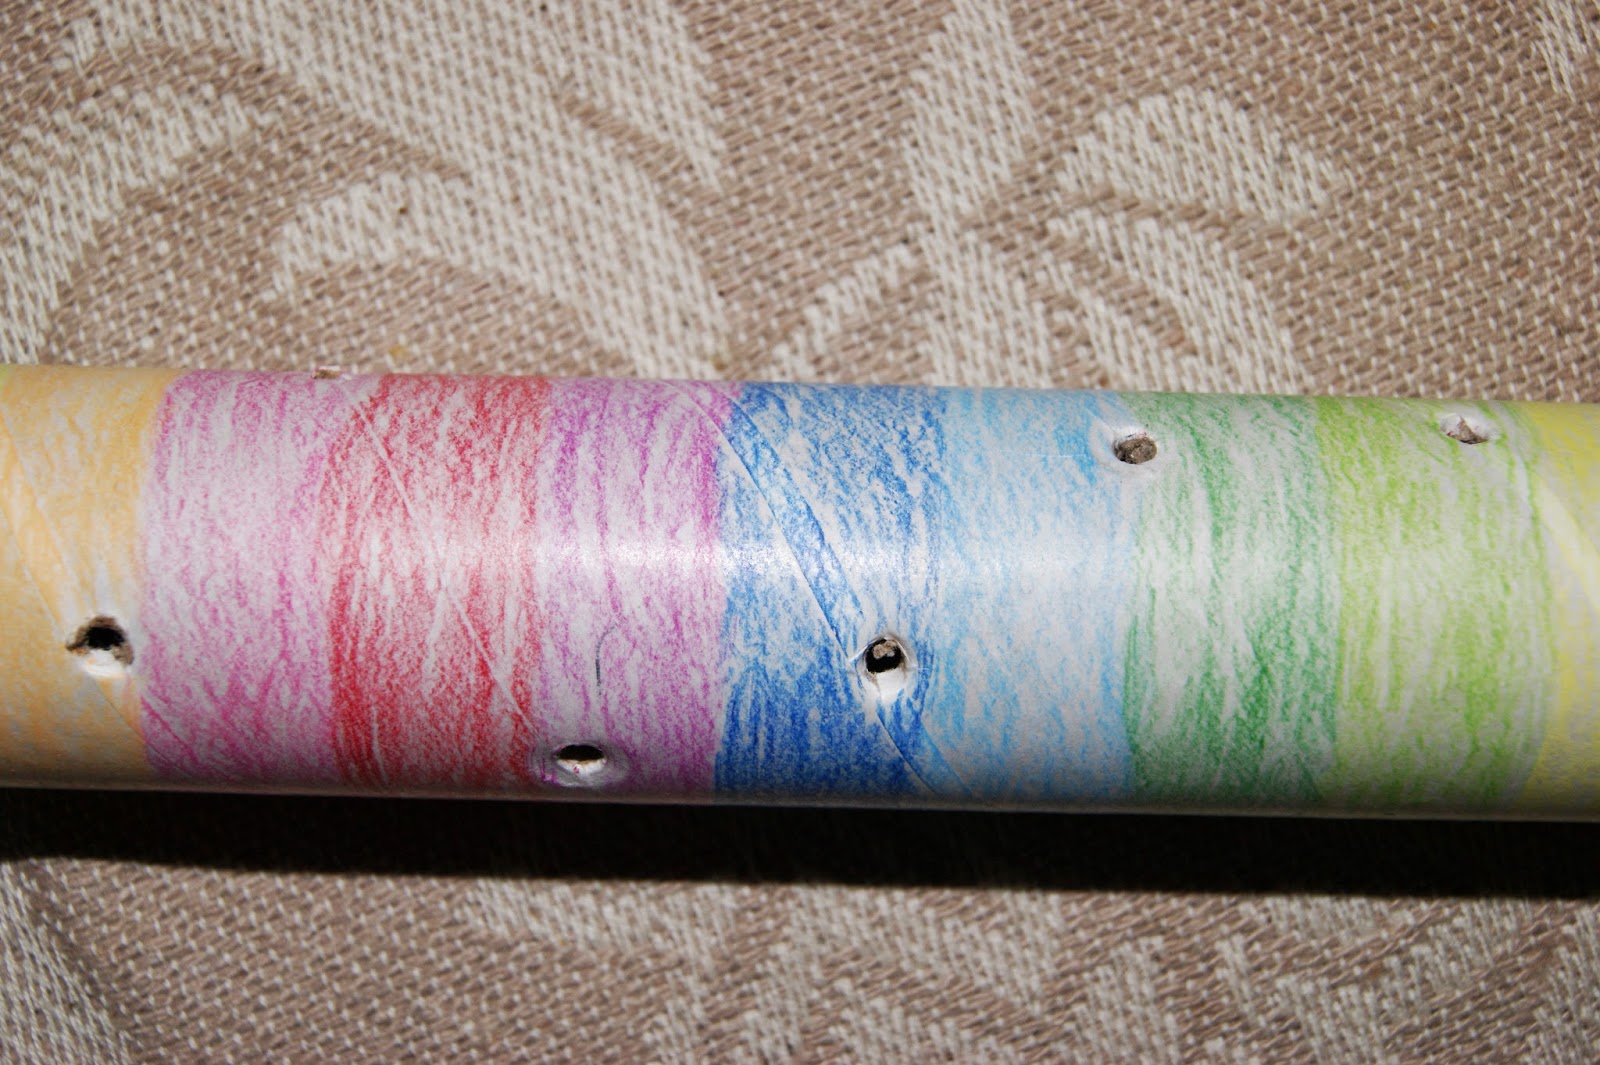
Then I drew dots on the tube in a spiral about 4cm apart so that the cut-outs won't touch when the suckers are pushed into it. I then selected a small drill bit and drilled on the marks and through the other side. Make sure the drill is going straight or the suckers will go skew.


I coloured the tube in stripes using watercolour pencils and then blended them with a paintbrush dipped in water but any paint would work too.


On the top, cut two slits about 1cm deep at 12 and 6 o'clock. Do the same on the bottom but make four slits of about 1.5cm deep at 12, 3, 6 and 9 o'clock .


Glue two of the cereal box strips together and cut a slit in the middle of the strip about halfway through. Do the same to the remaining strips.


Fit the strips together to make an X. This will fit into the bottom of the tube to form a base.


Push the suckers into the holes and you are done!


Tuesday, 16 July 2013

Can you do the can-can?

 
Ok so it's not a penguin but it is a can and I turned it into a bucket full of smiles. I intend to fill these with Flings as they look like smiles, although Cheese Curls or something similar would work just as well.


 If you love this or want something similar feel free to contact me on jen.astara@gmail.com to place an order.


For this project I used:
 
  1. Wire
  2. An empty Milo can
  3. A nail
  4. Some insulation tape for masking
  5. Acrylic paint
  6. Cardboard
  7. Inkjet Printer
  8. My Silhouette Portrait cutting machine (But Scissors will also do)
  9. Hammer
  10. Long-nosed pliers
 
  • First I removed the labels from the tins and knocked two holes into the can parallel to each other and about 2cm from the edge. This leaves a sharp jagged edge inside the can so I just flattened it with a small hammer.
 
  • Next I cut about 40cm of wire (make sure it's pretty flexible and easy to use) and bent the ends as shown.
 
  • Feed the end into the hole you made and grab the end with small long nosed pliers. Twist the wire to form a loop. Your wire is now secure. Do this for both sides. Tip: If in this process your bend comes undone simply make a new bend by grabbing the wire on the outside with the pliers and push down and towards the can.


  • Your bucket now needs some décor!
  • I used insulation tape as it was what I had and it is waterproof . I masked out shapes on the can and painted rainbow colours in stripes around it. When the paint is dry the tape comes off and leaves your masked out pattern.
 
  • For fun I added some rhinestones to one can.


  •  I printed and cut the label and glued it on, adding some rhinestones for sparkle.
  • And there you have one bucket o' smiles!

Waste not want not!

 
My son then decided the left over tape was a fun toy and scrunched it up. It was then I saw the way the paint had marbled on the tape and decided to wrap an old food can in it. This was the result:


These will now be the containers for the party packs.


Monday, 8 July 2013

The pursuit of Happiness...


 My baby will be turning one in September and I have decided the theme for his birthday is going to be "Happiness is...". I have so many ideas and most of them are going to be handmade so I got an early start.

I love being green and one of my favourite things is upcycling or re-purposing items. I can't throw anything away because there is a voice in the back of my head that says " I'm sure I could use that to make something.". One of those things happens to be baby food jars.

If you like what you see but don't want to make it yourself or simply don't have time please email me and place an order. jen.astara@gmail.com 


I used the stage 2 Purity jar for this project because it suited my requirements. Here's what you'll need to make a very novel invite:
 
  1. Baby food jar and lid (cleaned and all labels removed)
  2. Insulation tape
  3. Glitter paper/ cardboard for the lid
  4. Smiley face buttons
  5. Thin blue ribbon
  6. Printer paper in blue and yellow
  7. Jelly beans
  8. Craft Glue
  9. Glue gun
  10. Scissors
  11. 4cm wide sticky tape
  • First I started with the lid. Wrap the side of the lid in insulation tape. The side is about half the width of the tape so the other half will be standing straight up.


  • Then make vertical cuts in the insulation tape as shown below.
 
 
  • Carefully press the flaps down so they stick to the lid. You will be left with a small piece of the lid showing.
 
  • Trace around the lid on the back of the paper you wish to use and cut it out. I used a compass for more accuracy. Using the craft glue, stick the circle onto the lid and leave to dry.
 
  • I then took the smiley face buttons and tied a ribbon behind it. You can make them short, like this pink one or longer like the blue one below.


  • Using your glue gun attach the smiley to the lid.
 
  • For the outside of the jar I cut a piece of blue printer paper 3.5x7 cm and on yellow paper printed "happiness is...". I cut the yellow paper to fit inside the blue and glued the two together. Using wide sticky tape (about 4cm width) I stuck the label to the bottle.
 
 
  • I printed the invitation on the same blue paper as above so that it measured 5x21 cm. I then began to make a napkin ring type holder for it. I used Mr Happy from the Mr men and to save ink printed in black ink only on yellow paper and cut him out. Then I cut ribbons of about 4cm in length.
 
 
  • Using the glue gun, I glued the ends together and allowed enough glue to be exposed that I could place Mr Happy over the join.
 
 
  • The invitation then got rolled up slightly smaller than the ribbon ring and slipped in easily, opening up to fit snugly inside.
 
  • I filled the bottom of the jar with jellybeans and popped the invite in.
 
 
And there you have an environmentally friendly and rather unique invitation.