Sunday, 15 February 2015

Life's a bleach...


It's a new year and so many things have happened in my life. I started a new job after being at home with my little boy for two years and while I am still getting used to the "hectic-ness" of a fulltime job and a little one in kindergarten I am loving life!

It is in this vein that I wish to remain aware of the things I have in my life and to be grateful for all I have. It's been a rough two years financially and emotionally but I'm stronger for it. This year I'd like to theme my posts around gratitude and  there are three things I am very grateful for at the moment:

  1. My new job - a stable salary means I could get a car and still have enough to feed my crafting addiction
  2. My new job - I like what I do. I got my dream job. I get to teach my two favourite things; English and Textile Gestaltung which is German for what translates to needlework. Yes, I teach children to make stuff, my life rocks.
  3. My very creative friend Kerry who is constantly inspiring me and surprising me with her talent.
And it is from her that |I got this idea:

I used my Silhouette Portrait to cut clear vinyl to make a stencil, but you could use a craft knife. Then after many spray bottles I found the perfect fine mist spray (this is important) and sprayed on the bleach. I used neat thin bleach The results were awesome... well except the owl, like I said the spray bottle is important. Too much bleach soaks the fabric and ruins the crisp lines.


I hope you enjoyed the post and will try out the bleaching for yourself... warning it's highly addictive so have lots of shirts handy!

Sunday, 19 October 2014

Busy, busy, busy...

So my life has been hectic lately and I have much neglected my poor blog but I have some awesome cakes to show for my busyness. So here they are:


Thursday, 3 July 2014

Foxy biscuits

Wow! It has been so long since I last blogged I'm actually ashamed. (hides face in hands) But I'm back in the game and have a lot of catching up to do so I will get right to it. 

I made these gorgeous little foxes as Easter gifts (I know, I know that was ages ago) but the principle of icing the biscuits with fondant is applicable to any occasion and super simple to do!

You will need:
  • biscuits in your shape of choice
  • fondant
  • an impression mat (optional)
  • a cookie cutter (the one used for the biscuits)
  • a little water and a paintbrush
First I rolled out the fondant and used my impression mat from my embosser to make a pattern. If you have proper cake texture mats then use those.


Then using the cookie cutter from the biscuits, I cut out three of the same shape in different colours

And placed the very gently one on top of the other, lining the edges up perfectly

I then used the cookie cutter to cut the pile into three pieces and separated each slice.

I wanted mixed colours so I put the pieces back together with alternating colours. Once that was done I wet the back of each fondant piece with a little water and put it onto the biscuit and smoothed it on, careful not to remove the embossing.

After that I packaged them and stuck them onto this fox treat holder I bought from Silhouette and cut on my Silhouette Portrait

Another biscuit I made with this technique:
I hope you enjoyed this tutorial!

Sunday, 9 February 2014

Serendipity and Valentine's Day...

Have you ever had a brilliant idea; a unique idea you thought had surely never been thought of before and your plan was to unleash your brilliance unto the world and everyone would be astounded by your creative flair and untapped talent? Well if you have then chances are you also found out that someone else had had the same idea at roughly the same time. In fact your idea doesn't really belong to you at all because to your shock (and disappointment) quite a few other people have already decorated their Pinterest pages with variations on a theme. 

It makes me wonder if this is how trends start. Are we all connected like Jung thought in some collective unconscious and we all simultaneously decide that this or that will be popular. And now I'm sure your thinking that I am going to say that this happened to me. I'm not. It happened around me and I just happened to have picked it up.

I was looking for something to do for Valentine's day. I've always liked Valentines Day but seeing as it's just me and my baby boy this year I don't foresee any bunches of roses or chocolates coming my way. Still it is better to give than receive and as I LOVE giving presents I thought I'd make a few and get my little cupid to deliver them. 

Sillhouette America always has a free shape of the week and I eagerly await every Tuesday to see what it is. Two weeks ago it was pieces for an arrow, the flights and a heart for the head. My thought, "Oh cute, is that a pencil they've used for the shaft?  I could put a pencil in there and Rory could give it to his Granny" (she's a teacher). Sure enough I went to the Silhouette blog and there it was with a pencil in it.Check it out here. Great I thought, I'll make a version of my own and blog it.Then I get an email to say that Ilda Dias from www.ilovedoingallthingscrafty.com has just posted something new and among her beautiful Valentines creations is, you guessed it, a pencil arrow. See her works of art here.

So here is my version of the seemingly popular pencil arrow and a little something extra. I wanted to try the Sharpie marker coffee mug decorating. 


The mug came out really well. I followed these steps: 

1) cut out a vinyl stencil (unless you plan to freehand) 
 2) place it on the mug and colour in the spaces with a Sharpie marker
 3) Peel off the vinyl to reveal your image

4) Bake in an oven at 200 C for 30 mins then turn off the oven and leave to cool.

Mine still wanted to come off the mug in places so I just coated it with some clear nail varnish.

Thanks for stopping by and feel free to leave a comment!

Tuesday, 4 February 2014

The best way to say thank you...

The best way to say thank you is, in my opinion, with food and the sweeter the better! 

A friend of my mom's helped me out in a HUGE way so I decided to do something a little unusual to say thank you. 


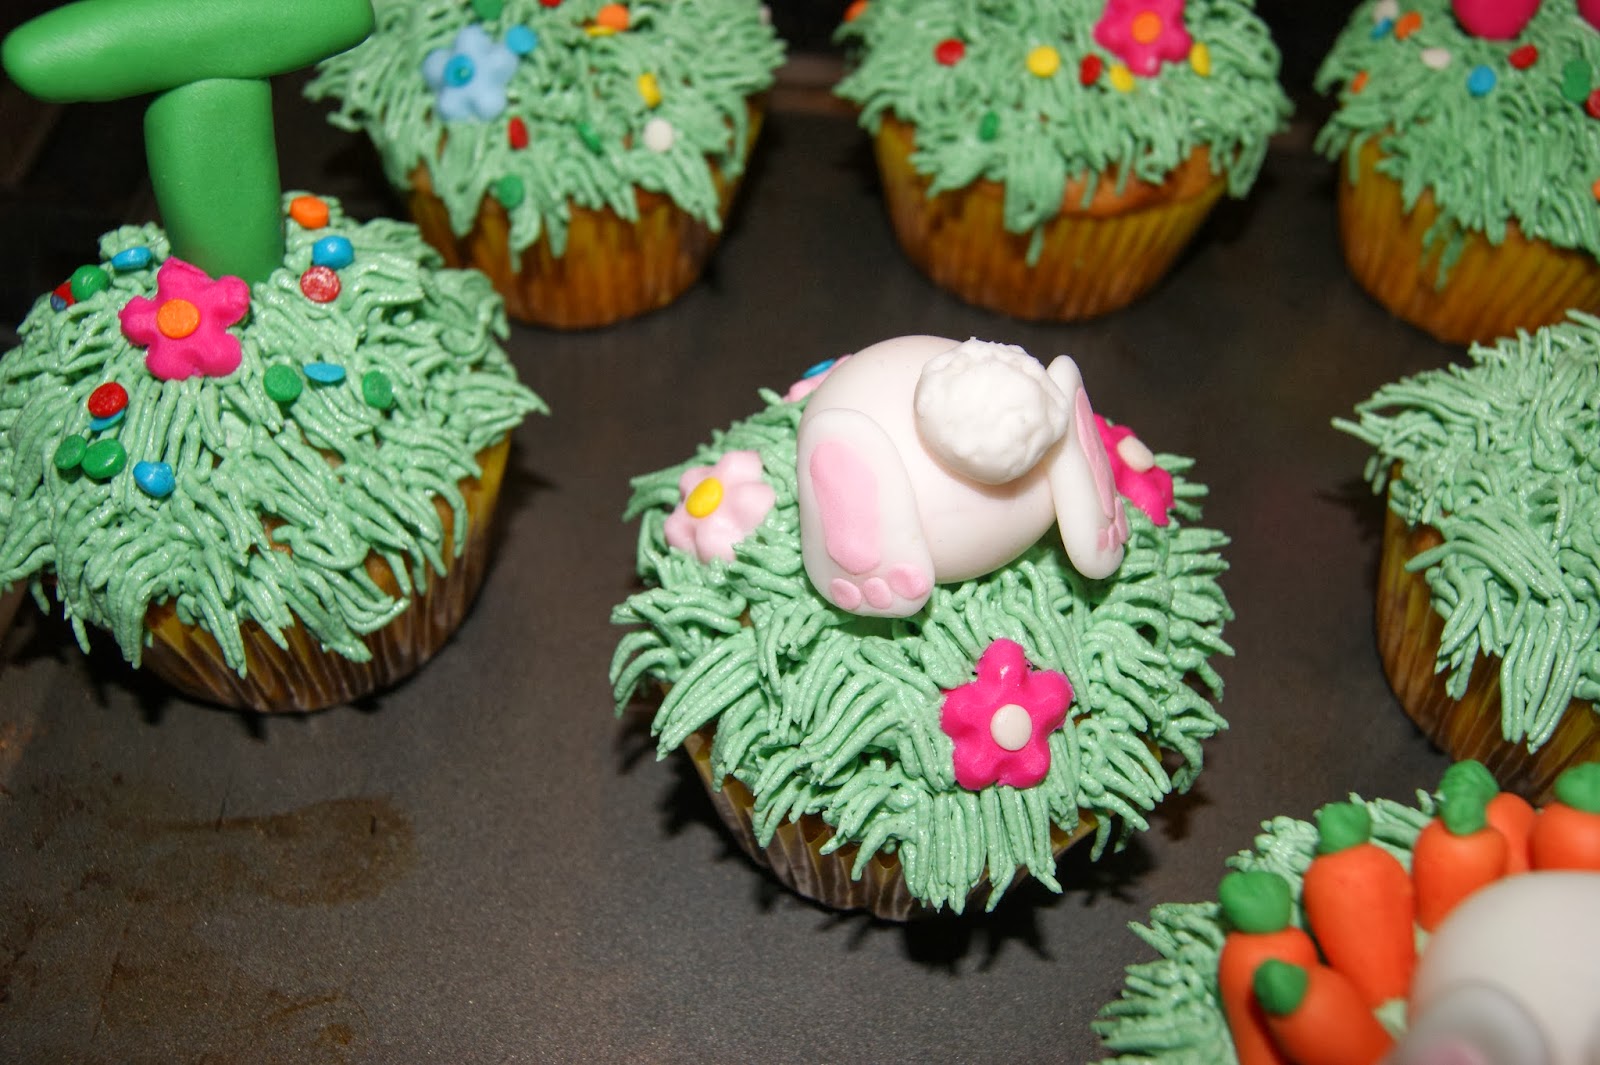
These are plain vanilla cupcakes with buttercream icing and I just got my "grass" icing nozzle so I was dying to try it out. I watched a Youtube video on how to use it and it was really easy once I had the technique right.
The letters are made of fondant icing and stuck into the cupcakes with toothpicks. The bunnies, carrots and flowers are also fondant icing. 


I love this ravenous bunny! 


I'm thinking, for the next batch, of making a cupcake wrapper that is a picket fence and maybe adding some Easter flavour for a cute gift instead of the traditional eggs. I'd love to hear your thoughts and suggestions!